
1. Requirements
- SD Card, formatted using FAT32 or VFAT filesystem (see this page for more info on filesystems)
- Account in VidiCenter
- A Brightsign player connected to internet
- For Series 4 player, we support up toBrightsign OS 8.5.64
- For series 5 and series 6 players, we support up to 9.1.92.1. Brightsign OS 9.0 is no longer supported
- An USB or IP camera*.
*IP cameras are only supported on the XT5 (XT1145, XT2145) and Series 6 players
2. Supported BrightSign players
Note : If you plan to use an USB camera, please make sure that your Brightsign player has a USB port - For exemple, the XD236 and HD226 don't have a USB port
3. Setup process (Vidireports 7.9.4.0 and above)
1. Setup the player
- Start your BrightSign Player like you would normally do: connect a display, along with a keyboard or Ethernet cable, and power it on. You'll find more information on BrightSign's support site.
- If necessary, upgrade the OS
2. Upgrade the firmware of the player
- Download the Vidireports firmware from the Software Page
- Copy the .bsfw file with Vidireports onto the SD card, create the “quividi” directory, and plug it into the player. It will perform the installation just like a “normal” firmware.
- After the installation, the player will reboot and VidiReports will automatically start when the player is powered and a USB camera detected.
If you remove the SD card while the player is running, restart it after plugging the card back.
| Note : In addition to the « quividi » directory, the SD card may contain typical content for the player (movies, BrightAuthor generated files, etc…). |
4. Player registration
- First, open the OEM page for BrightSign: https://vidicenter.quividi.com/next/oem/brightsign/
- Now that your player is running Vidireports, a Box and Location have been associated to it. In order to access the data generated, we need to move them in your network (For more information about this, please review this article)
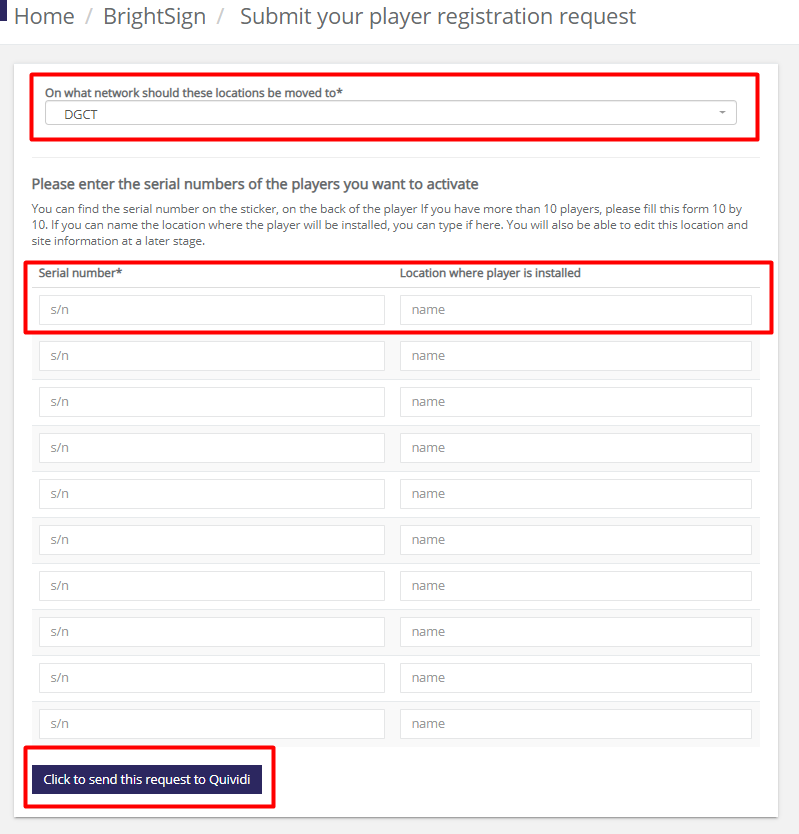
- Select your network in the list
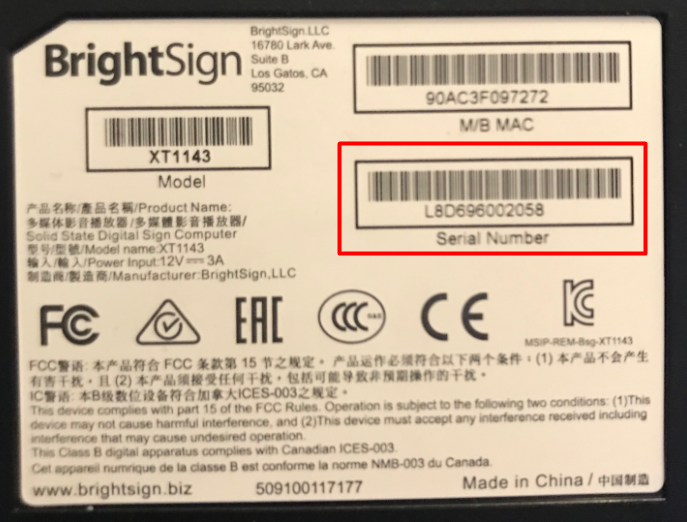
- Locate your player serial number (usually on the back of the player) then enter it on the page
- Name the location that will appear in your network.
- Send the request to Quividi - Under 48h, the locations and boxes will appear on the specified network. You can then move them to a site if needed.
5. Accessing VidiReports Control Center
In order to access the VidiReports Control Center, you will need a PC on the same network. Open a web browser (Chrome is recommended), then enter the following URL http://<player IP address>:9080/, using the IP address of your BrightSign machine. The default logins are admin/secret.
Exemple URL: http://23.76.60.180:9080/
For more details about VidiReports configuration, please refer to this article
Legacy Setup - VidiReports 7.9.3.0 and earlier
1. Start the player
- Start your BrightSign Player like you would normally do: connect a display, along with a keyboard or Ethernet cable, and power it on. You'll find more information on BrightSign's support site.
2. Upgrade the firmware of the player
- First, access to the firmware update from the Software Downloads page - If you don’t see the file for your player, send a request to help@quividi.com
- Copy the .bsfw at the SD card root
- Create a "quividi" folder at the SD card root
- Plug the SD Card in the player while it is running
- The upgrade will be done automatically, and the player will reboot afterwards. You will see something happening on your screen during the upgrade process.
If you remove the SD card while the player is running, restart it after plugging the card back. Failure do to so might wipe the local VR instance and create a new boxID